

How To Make Realistic Water In Blender
(This was written using Blender v2.43)
Using the Fluid Simulator and Yafray to create realistic looking water [edit | edit source]
This tutorial volition (hopefully) successfully walk you through creating semi-realistic looking water using the Fluid Simulator in Blender, then rendering in Yafray.
Getting Started [edit | edit source]
When you outset open blender there will be cypher but a blank cube.
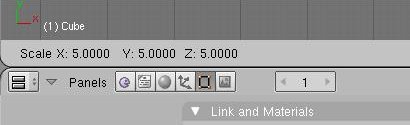
- Make sure you are in object mode, and scale the cube up to about 5. Do this past pressing S in the 3d view and property ctrl, motility your mouse until the numbers in the bottom left of the screen are 5. Or select the object and printing S and then five.
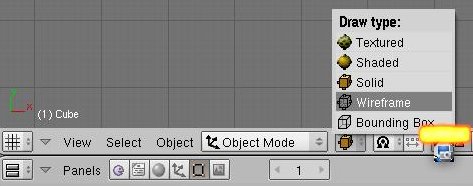
- Side by side, in the viewport shading box select wireframe. This lets you see through the cube.
- We are now going to enable the cube for Fluid Simulation. With the cube nevertheless selected in object mode, press F7 (object button) and then press the "Physics Push button".

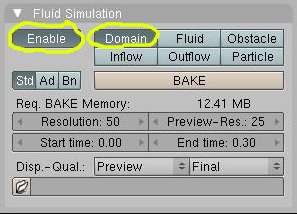
- You should see a tab labeled "Fluid Simulation" press Enable and and so Domain. Later pressing Domain several buttons will pop upwards, these will exist used afterwards.
- Make sure yous are in pinnacle view at present, if not but press NUMPAD7. Next press space>Add>Mesh>Cylinder. 32 vertices is ok.
- Now middle click and drag in the 3d view to see the cylinder within your beautiful box. (yay!) What'due south going to happen is the cylinder is going to be turned into liquid, and the big box is where the liquid tin menstruation about. (it is the "invisible wall")
- Movement the cylinder to a corner of the cube, y'all tin can give it some height if you like. Now with the cylinder still selected press Shift-D to duplicate it. Move the new cylinder to the reverse corner.

- On both of the cylinders go the fluid sim. tab and printing Enable and so Fluid. This tells blender that these cylinders are fluid.
- IMPORTANT!!! After this, you MUST subsurf both of the cylinders, but don't apply information technology. Instead, when the cylinder shows a preview of the subsurf, click the "X" in the top-correct of the subsurf preferences.
(noobie note: I don't know what the in a higher place step is for, adding the subsurf then click "X" removed it.)
- Switch to Object Mode then Right click on the big box (the domain) and press the big Broil push button. A trivial box will popular upward and just click on the top choice.
- Now you should come across a blob looking thing announced in the cylinders, and it volition fall to the ground and splash around. Your computer is "blistering" the liquid. (Computing where it should go)
- As you see now, the liquid isn't very realistic looking. If you lot practise a render, you will see. You would also come across that the cylinders are appearing in the image. This is not wanted, so with both of the cylinders selected, press Grand then click on one of the petty boxes that isn't already pressed. This moves them to another layer.
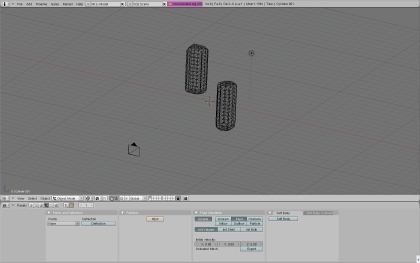
- Now we are going to move the camera to a different position for a amend view. Move the viewport around until information technology's where you call back will give you the best view and press SHIFT-NUM0 to make the camera match your electric current view.
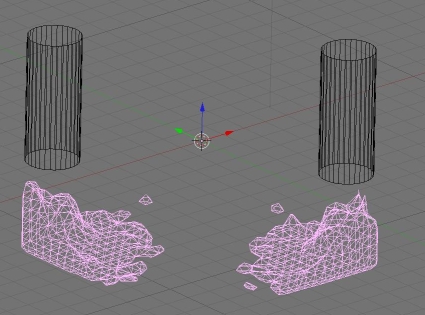
- Drag the newly placed camera dorsum a bit, so the when NUMPAD0 is pressed well-nigh of the scene is in view. You should at present have something that looks like to this:
- Now we are going to rebake the water at a higher resolution for a more than detailed result. Select the goo looking mesh, (both blobs should plow purple if either is clicked) and become the fluid simulation tab again. Plough the resolution up to almost 100 (or whatever you want) this rebakes the fluid for more detail. If you turn preview mesh up too, you will see information technology more detailed earlier rendering. Baking now may take a while.
- Afterward its done baking, you lot are gear up to modify the cloth of the water to something better looking.
- First modify the renderer to YafRay. Printing F10 then nether the big Render push select YafRay. Brand sure Yafray is installed first, the choice still appears if you don't.
- Change the background white by pressing F5 then click on the box that has earth buttons appear when the cursor is hovered over information technology.
- You volition come across HoR, Pig, and HoB. Turn these all the way over to ane. The preview should plow white.
- Now get to the textile buttons (ruby-red sphere) and make everything look like the following: (I retrieve I circled all the changed options, but maybe not.)

- After this is completed look through the frames by pressing right arrow, find one that looks absurd then printing return and yous may get something similar this:

Hopefully you got something similar that :)
(that'south all folks...)
If the return does not expect smooth, apply a subsurf.
[edit | edit source]
This YouTube tutorial on fluids might also aid: Link and this Realistic Water Texture
Video tutorial showing fluid simulator objects in Blender ii.49b: http://world wide web.youtube.com/watch?v=wX5w1Kmsv_A
User Question: When I click Bake there is no box that shows upward, I cannot get it to broil my fluids at all, all information technology does is add a agglomeration of files to my hard drive and have a long time, What should I do?
Reply: Be certain to set the directory that you would like the files to be saved to, the pick to practice and then is in the expanse where you inverse the box to a domain very bottom there is a binder. Chose a directory and all will be good.
User question: When i click the bake push it says there tin can't exist more than one domain object. I did everything you said to practise but i don't sympathize why information technology says that.
Answer: The but solution I take establish around that is to go to the pinnacle header and where it says "SR:2-Model" change that to player and select the different objects until y'all find something that doesn't highlight. Delete those. I constitute that occasionally a domain "disappears" and when you brand a new one causes this trouble. I accept as well constitute it meliorate to set up the domain terminal around your scene to prevent this annoyance too.
Note: The domain object does Not disappear - the Domain object IS the object on your screen which represents the fluid itself.

How To Make Realistic Water In Blender,
Source: https://en.wikibooks.org/wiki/Blender_3D:_Noob_to_Pro/Realistic_Water_using_Fluid_Sim_and_Yafray
Posted by: hunterpubleausing.blogspot.com
0 Response to "How To Make Realistic Water In Blender"
Post a Comment